Table of contents
Generic OS Installation
Insert OS installation media into one of the USB3 ports (blue on Thinkpads). For certain OSes, Heads boot process supports standard OS ISO bootable media (where the USB drive contains the ISO installation media alongside of its detached signature). For other OS, you will need to create USB installation media with using dd or unetbootin etc.).
For supported OSes, on a EXT3/EXT4/ExFat formatted partition on USB drive, you can put the ISO image along with a trusted detached signature in the root directory:
/Qubes-R4.0-x86_64.iso
/Qubes-R4.0-x86_64.iso.asc
/tails-amd64-3.7.iso
/tails-amd64-3.7.iso.sig
- Some distros will require additional options to boot directly from ISO. See Boot config files for more information.
- Boot from USB by Boot menu options, or by calling
usb-scanfrom the recovery shell.- Select the install boot option for your distro of choice and work through the standard OS installation procedures (including setting up LUKS disk encryption if desired)
- Reboot and your new boot option should be available through boot options: show boot options.
Each ISO file is verified for integrity and authenticity before booting so that you can be sure Live distros and installation media are not tampered with or corrupted, so this route is preferred when available. You can also sign the ISO with your own key from Heads Recovery Shell menu option (Options-> Exit to recovery shell) :
mount-usb --mode rw #Loads USB controller kernel modules, scan for partitions,
ask which one to mount under /media
cd /media # Change directory to /media to do the detach-sign operation
gpg --detach-sign <iso_name> # You can use TAB keyboard's key for autocompletion
of file names here. This requires a provisioned USB security dongle: Factory
Reset/Re-Ownership
reboot # Will remount everything in Read Only and sync changes to block devices
automatically.
Then boot from detached signed ISO after having rebooted your machine. To do so, from main menu, select: Options-> Boot Options-> USB boot Select your ISO from list, see detached signature validation succeeding, then select GRUB parsed options with label and main boot parameters from the options provided to you.
Compatibility
Heads requires unencrypted /boot. Graphical OSes generally have the best support. Debian live installers, Fedora Workstation (or spins), Qubes, and PureOS all work well.
- For Debian:
- Use a live desktop image. The network installer image does not work on all systems.
- Ensure
/bootis unencrypted. Debian 11 defaults to a single encrypted partition, so you must partition manually. This may not apply to all Debian derivatives.- Create one 1G ext4 partition mounted at
/boot - Create a LUKS container with one ext4 partition mounted at
/. - For swap, you can create a swapfile later on the encrypted root, or create a swap partition.
- Create one 1G ext4 partition mounted at
- For Fedora: The default partitioning works, but
/is btrfs by default, which Heads’ recovery console does not support. Use ext4 instead for recovery console support. - For Qubes: Be sure to disconnect USB tokens during configuration on first boot. Otherwise, the Qubes installer may prevent the creation of a sys-usb qube if they are detected as keyboards (HID devices). If you are using a USB keyboard, follow the Qubes instructions for USB keyboards.
- For PureOS: The default installation works.
Default Boot and Disk Unlock
If you want to set a default option so that you don’t have to choose at every boot, you can do so from the menu by selecting ‘d’ on the confirmation screen. You will also be able to seal your Disk Unlock Key into the TPM, which would be unsealed only when provided with the good TPM Disk Unlock Key passphrase and when firmware measurement and LUKS header are the same as when the Disk Unlock Key was sealed when booting from detached signed default boot option selection.
This should work for Qubes OS, Fedora, Debian (and derivatives).
Installing Qubes 4.X
Qubes OS and Tails can boot directly from ISO when provided with accompanying detached signatures (iso.asc or iso.sig), thanks to distribution signing keys being provided under Heads, permitting to validate both integrity and authenticity of the ISOs prior of booting into them.
Plug in the EXT3/EXT4/ExFat formatted USB stick containing Qubes iso and iso.asc files into one of the USB port and boot it from USB mode:


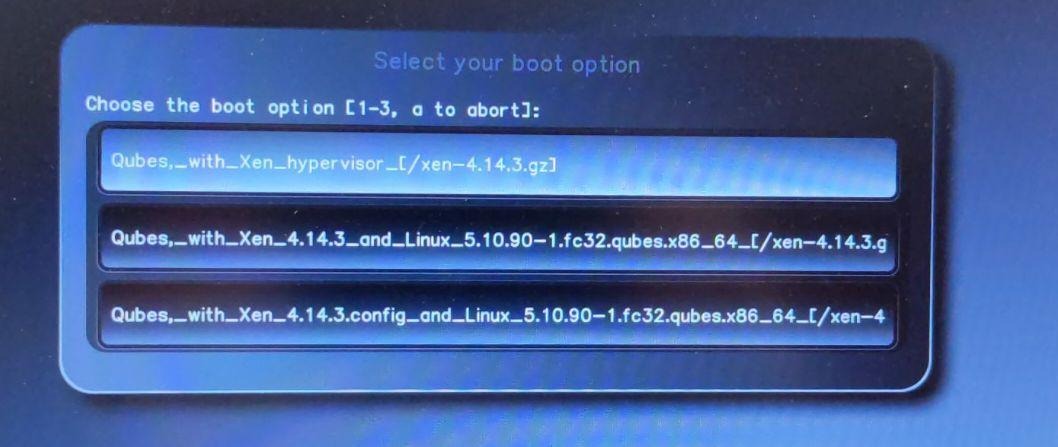
If that completes with no errors it will launch the Xen hypervisor, kernel and initrd provided from ISO and start the Qubes installer: 
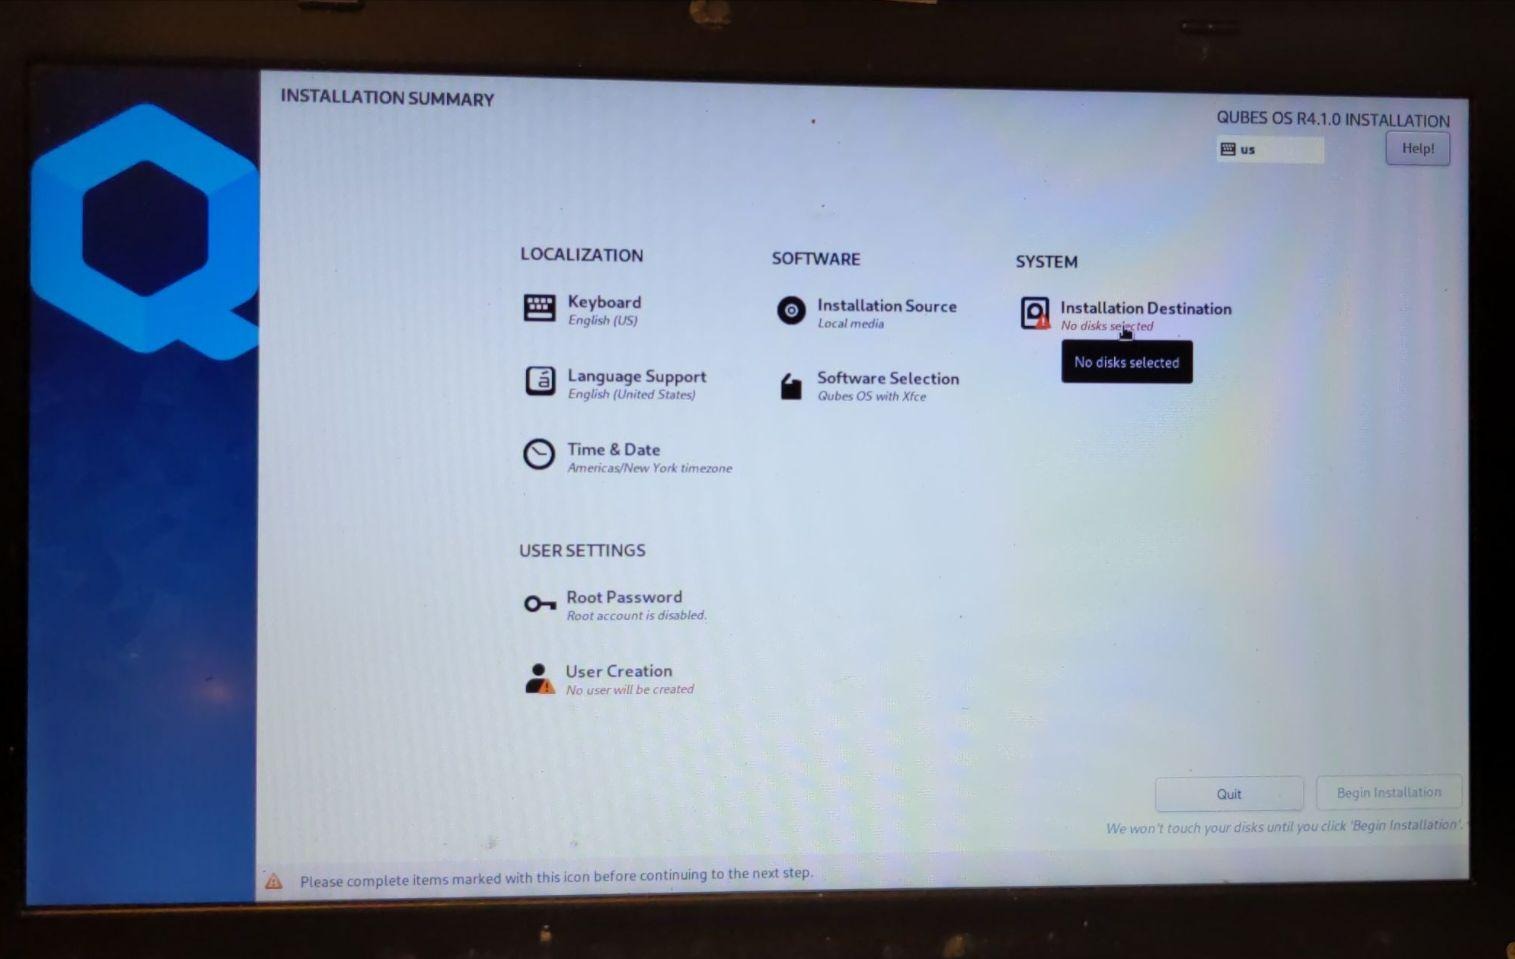
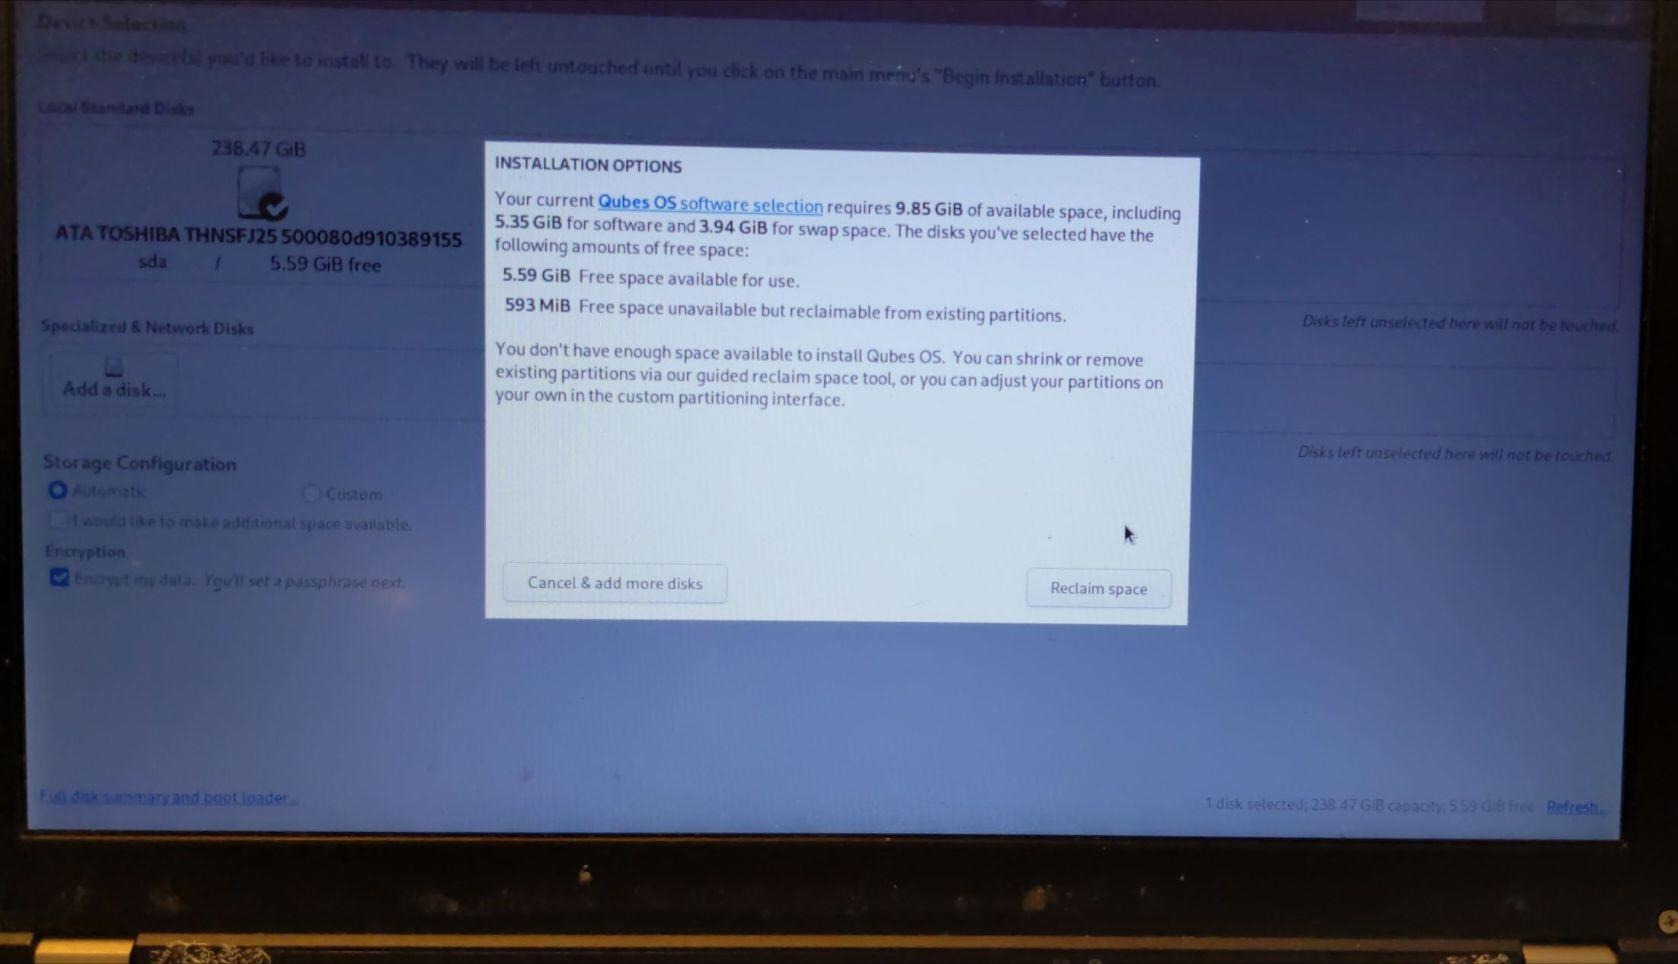
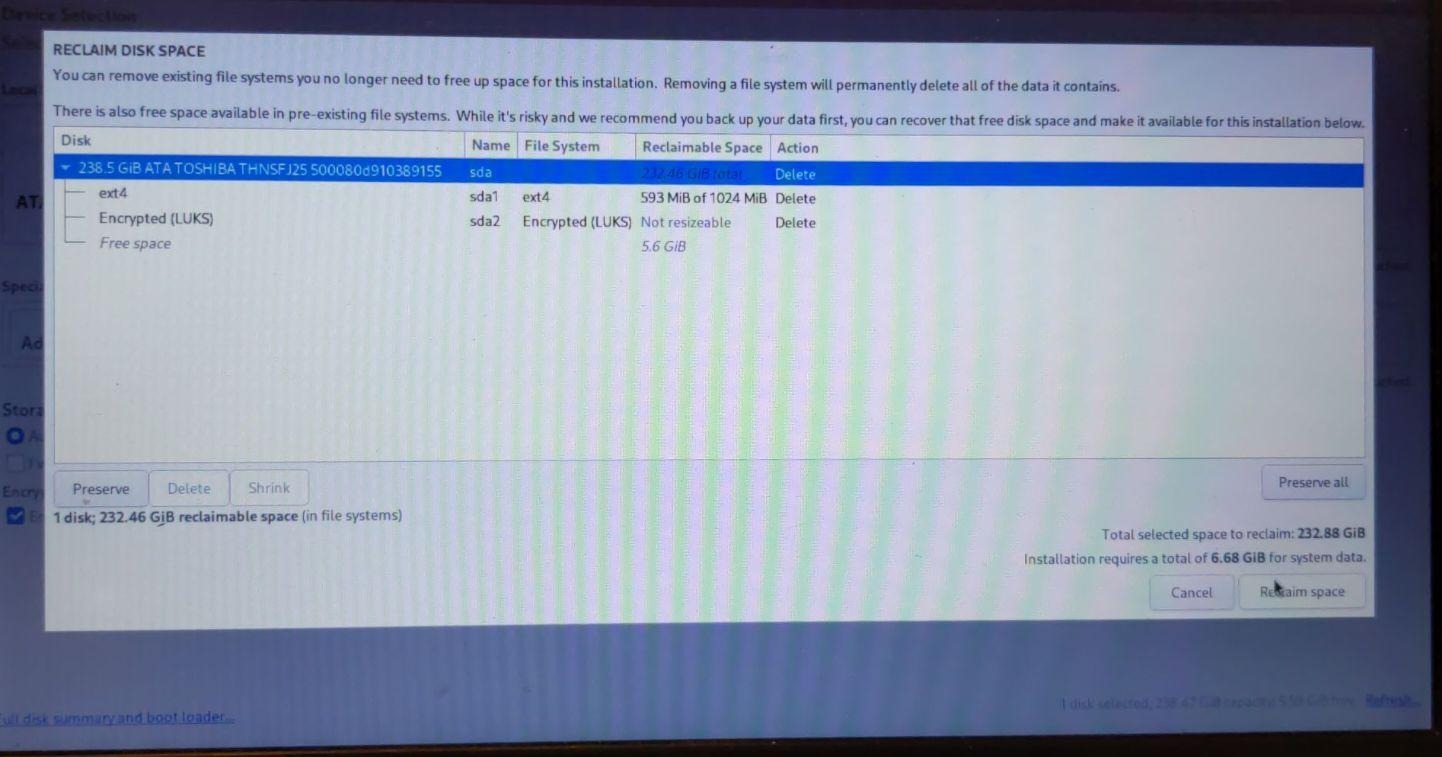
Use default QubesOS partitioning scheme for QubesOS 4.x: 

The Disk Recovery Key that you enter here will be used as the “recovery password” later. It should be a long value since you won’t have to enter it very often; only when upgrading the Heads firmware, when setting a new boot default and desiring to change TPM released disk encryption key (Disk Unlock Key), or if there is a need to recover the disk on an external machine. 


 First stage install is finished.
Disconnect your USB Security dongle (and any external keyboard/mouses) prior of going further. Otherwise Qubes might detect those as USB Keyboards (HID devices) and will prevent sys-usb from being created properly: 


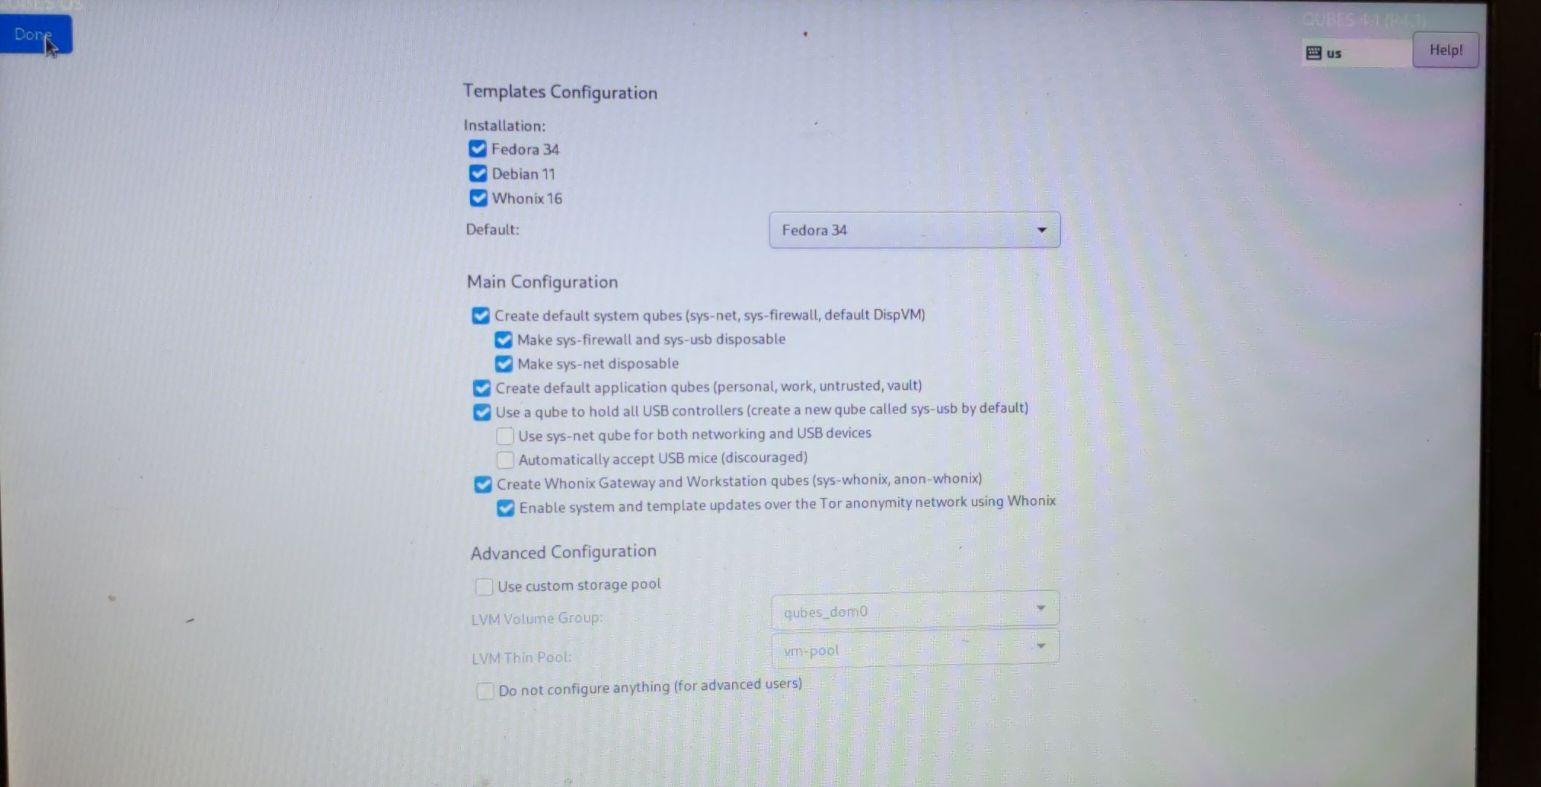

You should now have Qubes 4.1 installed!
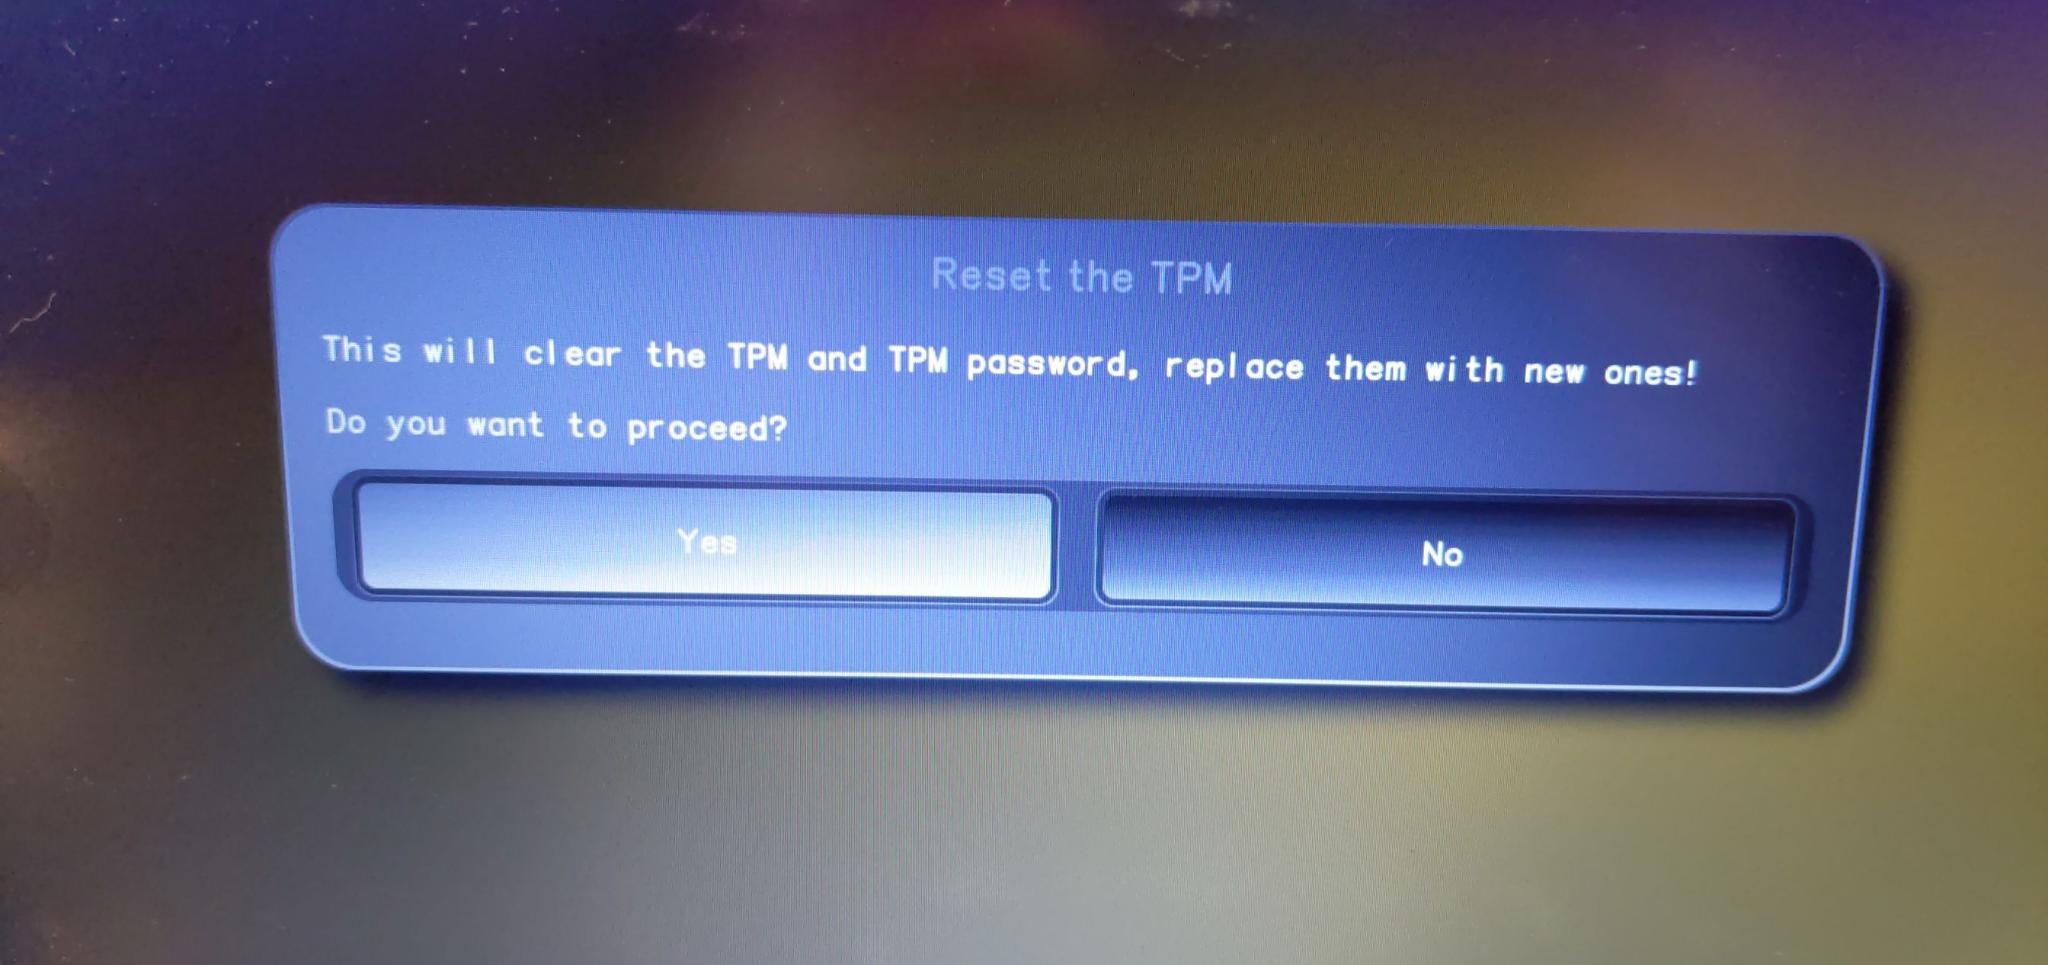
Taking ownership of the states
Taking ownership of the TPM
Heads keeps TPM and HOTP rollback counters under /boot. Since we just installed, those doesn’t exist and we need to create them. First things first, we need to acknowledge current firmware state for the newly installed OS.


 That’s it. You now have TOTP scanned over your preferred TOTP smartphone app, or have entered manually the challenge secret under your favorite external TOTP app on another computer because you do not own a smartphone.
Signing /boot content
Now that firmware state is sealed under TPM and remotely attested through TOTP/HOTP, now is the time to sign /boot content until your next dom0 upgrade, which will most probably update Xen, initrd and kernel binaries, as well as grub configuration. This will be prompted automatically when selecting default boot option, since we have no digests nor detached signature of /boot content as of now.
This can be done at any given time through: Options-> Update checksums and sign all files in /boot
NOTE : It is advisable to remove all USB security dongles (yubikeys and others) and only plug in the corresponding one when you want to update kernel settings to avoid some issues.
If you freshly installed an OS, the following should pick up automatically: 


Setting a new boot default
If you choose to add the Disk Unlock Key to the TPM, you’ll need to specify which LUKS volume. A default Qubes install will work if you leave the ‘Encrypted LVM group?’ response blank and enter /dev/sda2 when asked about ‘Encrypted devices?’. For more details see the TPM Disk Unlock Keys section below. You’ll then be asked to enter the Disk Recovery Key as well as the new boot passphrase you’ll use to unseal that key.


Until next dom0 upgrade, this is the normal boot process


When updating dom0 from Qubes OS update widget
You need to reboot directly after applying dom0 upgrades. You should follow this Qube’s forum Verifying Installation post to investigate integrity of dom0 and /boot components.
You will then get a similar prompt when selecting the Default boot option: 
This is the result of Heads having verified that /boot/kexec.sig detached signature file of kexec_*.txt digests are still valid, but that the content of kexec_hashes.txt differs for some of the files measured under that digest. Heads will require you to generetate new digests and sign them.
Then, Heads will ask you to define a new boot default if grub.cfg file has changed:
!!! Boot entry has changed - please set a new default
Applying dom0 (or OS updates) that changed the boot related binaries and config files (updating the kernel, Xen, or the initramfs, etc) will modify /boot content. If someone has tampered with your /boot partition, this can also happen, so if you’re not sure of the situation, don’t proceed and investigate. The onlyway to make sure you are the origin of the changes is to reboot and sign /boot content right after the upgrade. On Qubes OS, that should only happen when upgrading dom0. For Other OSes, that can happen in any unattended upgrades, which requires you to inspect system upgrade logs or be aware of updates propositions: if a kernel update is involved, you sure need to reboot and sign now.
Choose the first option again (‘1’), then make it the new default (‘d’), confirm that you’re modifying the boot partition (‘y’), and that you don’t need to reseal the disk key (‘n’). You’ll be asked to insert your USB Security dongle and enter the GPG User PIN to sign the new configs and the system will reboot and allow you to proceed as normal.
Installing extra software
sudo qubes-dom0-update
powertop is useful for debugging power drain issues. In dom0 run:
sudo qubes-dom0-update powertop
You might want to make the middle button into a scroll wheel. Add this to /etc/X11/xorg.conf.d/20-thinkpad-scrollwheel.conf
Section "InputClass"
  Identifier  "Trackpoint Wheel Emulation"
  MatchProduct  "TPPS/2 IBM TrackPoint|DualPoint Stick|Synaptics Inc. Composite TouchPad / TrackPoint|ThinkPad USB Keyboard with TrackPoint|USB Trackpoint pointing device|Composite TouchPad / TrackPoint"
  MatchDevicePath  "/dev/input/event*"
  Option    "EmulateWheel"    "true"
  Option    "EmulateWheelButton"  "2"
  Option    "Emulate3Buttons"  "false"
  Option    "XAxisMapping"    "6 7"
  Option    "YAxisMapping"    "4 5"
EndSection
You’ll probably want to enable fan control, as described on ThinkWiki.
Disabling the ethernet might make sense to save power